


Introduction
The system management interface allows SoftwareUCM to manage its resources and provides network administrators with a method to monitor and view the virtual machine’s current state. Various options can be accessed and modified from the command line terminal. This guide explores the different types of information that can be retrieved from SoftwareUCM through the command terminal.
System Status
The system status provides users with various details about the SoftwareUCM hosted virtual machine. Once installed and launched, users can interact with the command line as follows:
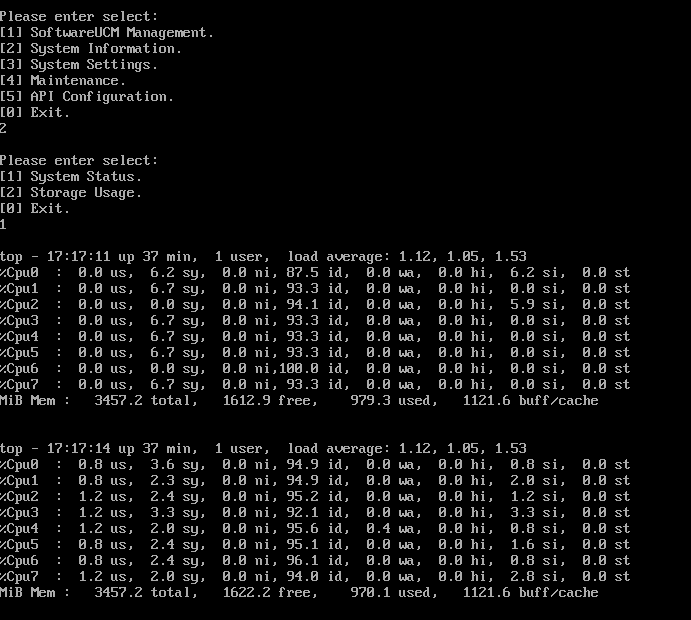
- Enter “2” to display the list of system status settings.
- Once the list is displayed, enter “1” to view the system status, which will show the current CPU and memory usage.
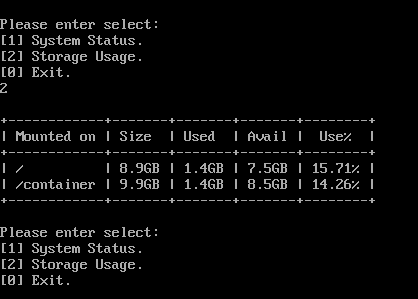
- Enter “2” to view storage usage information. This will display the total disk size, used space, available space, and the percentage of used space.
System Settings
Network Settings
Network Settings allow users to view and edit the network of the SoftwareUCM, such as changing the IP address assignment method, viewing the current network configuration, and pinging other devices to test connectivity. To access network settings, please see the following steps:
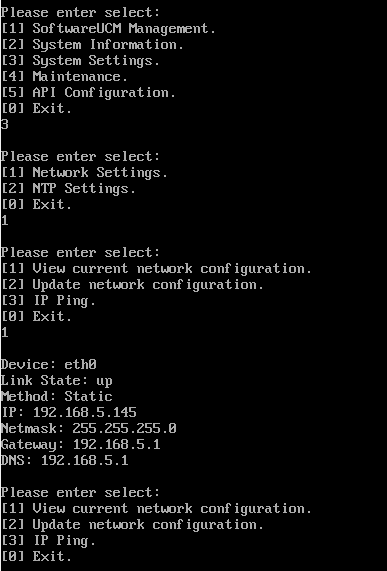
- Enter “3” to access the system settings.
- Enter “1” to access the network settings.
- Enter the option “1” to view the current network configuration.
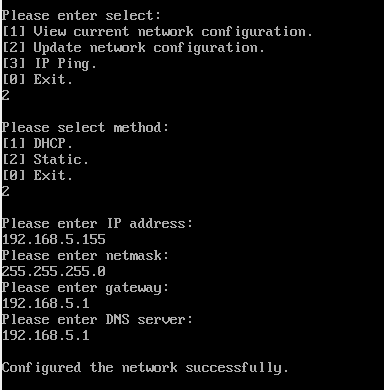
- To update the current network configuration, Enter “2”
- Once this is selected, you will be prompted to choose from setting up the IP address assignment statically or through DHCP, select option “1” for DHCP and option “2” for statically assigned IP
- To test connectivity to a specific device on the same LAN as the SoftwareUCM virtual machine, please Enter option “3”
- Provide the host IP address
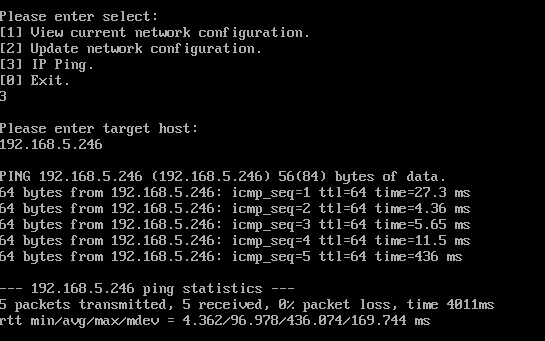
- Enter the option “0”, to exit the Network Settings
NTP Settings
NTP settings allow users to configure time related configuration for the SoftwareUCM instances created, this allow users to sync the time from the existing defined ntp server, update the ntp server used to retrieve time , or view the current ntp server information
- On system settings menu, Enter option “2” to access NTP settings.
- Enter option “1” to view the current NTP server used
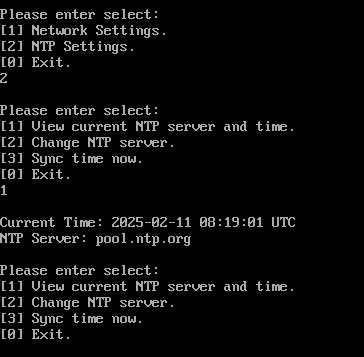
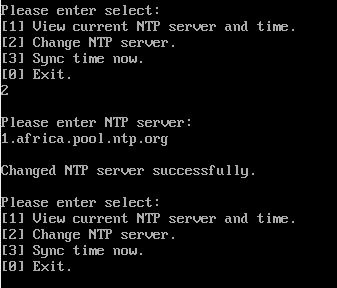
- Enter option “2” to update the current server with a new server from the available NTP servers pool.
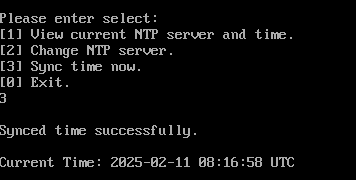
- Enter option “3” to sync time from the selected NTP server
System Maintenance
The system maintenance tab allows users to configure different aspects of the system, such as setting user-level passwords, installing specific patches or updates for SoftwareUCM, and enabling SSH access. In this section, we will go over how each option can be used.
- Select option “4″ to enter the SoftwareUCM Maintenance settings on the command line.
- To install a new patch, enter “1” for “Install a patch”. The patch package only supports downloads via an HTTP/HTTPS link.
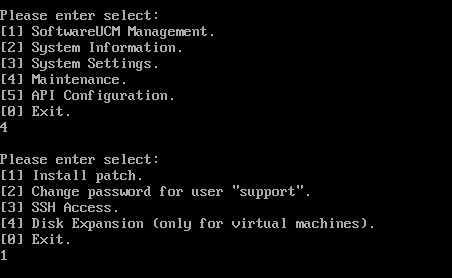

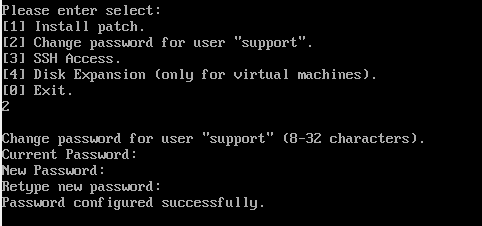
- Administrators can also change the password of the user by entering the option “2”, and by providing the current password and the new password.
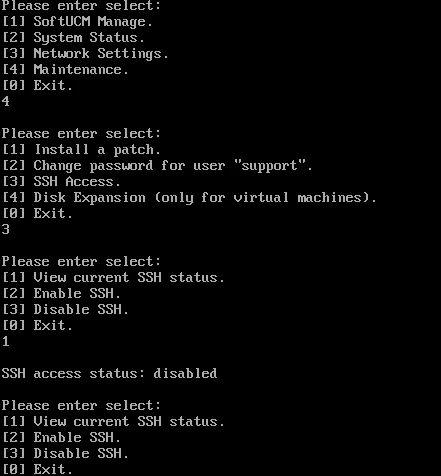
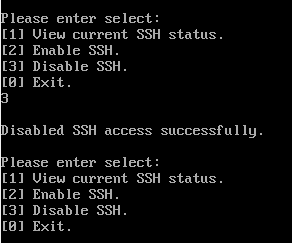
- To enable/disable SSH through the command line, Enter option “3”.
- Enter “1” to view the current SSH status.
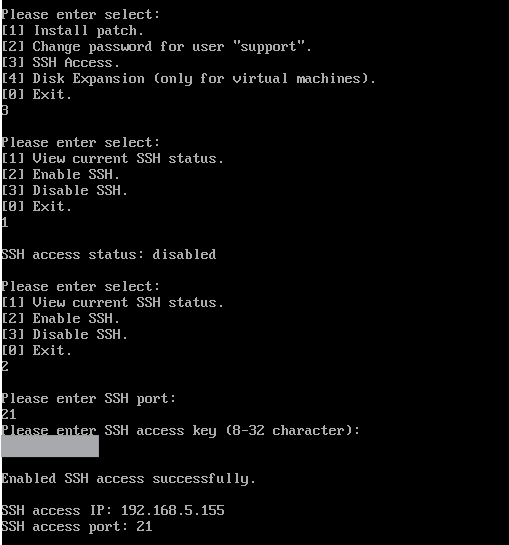
- Enter “2” to enable SSH. Once enabled, you will be prompted to define the SSH access port and SSH access key.
- Enter “3” to disable SSH
Disk Expansion
One additional option that can be configured from the maintenance settings menu is disk expansion. This option is only available when you install the SoftwareUCM tool on a virtual machine, and will allow the users to extend the storage space if needed, the process of expanding the disk memory of the SoftwareUCM hosted depends on the type of virtual machine used. Please refer to the below guides to follow the configuration that suits the virtual machine you are using: