Introduction
Instance Management in SoftwareUCM refers to the process of creating, configuring, monitoring, and maintaining individual virtualized instances of the UCM application within the on-premise environment. This includes managing the resources allocated to each instance, such as CPU, memory, and storage, as well as handling software updates, backups, and instance-specific settings.
In this guide, we will walk through each step of this process, to ensure that the SoftwareUCM instance is launched with the allocated resources.
Instance Management
Enter SoftwareUCM Management
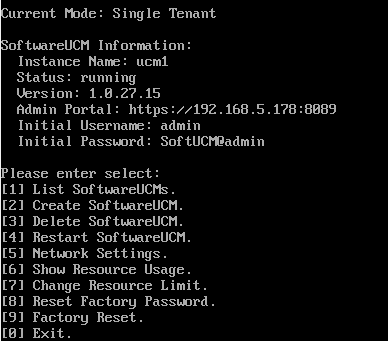
- Enter on the option “1” to manage SoftwareUCM instances.

After the ISO is installed, an instance is created in the Single Tenant mode, enter option “1” to view it
Switch from Single-Tenant to Multi-Tenant Mode
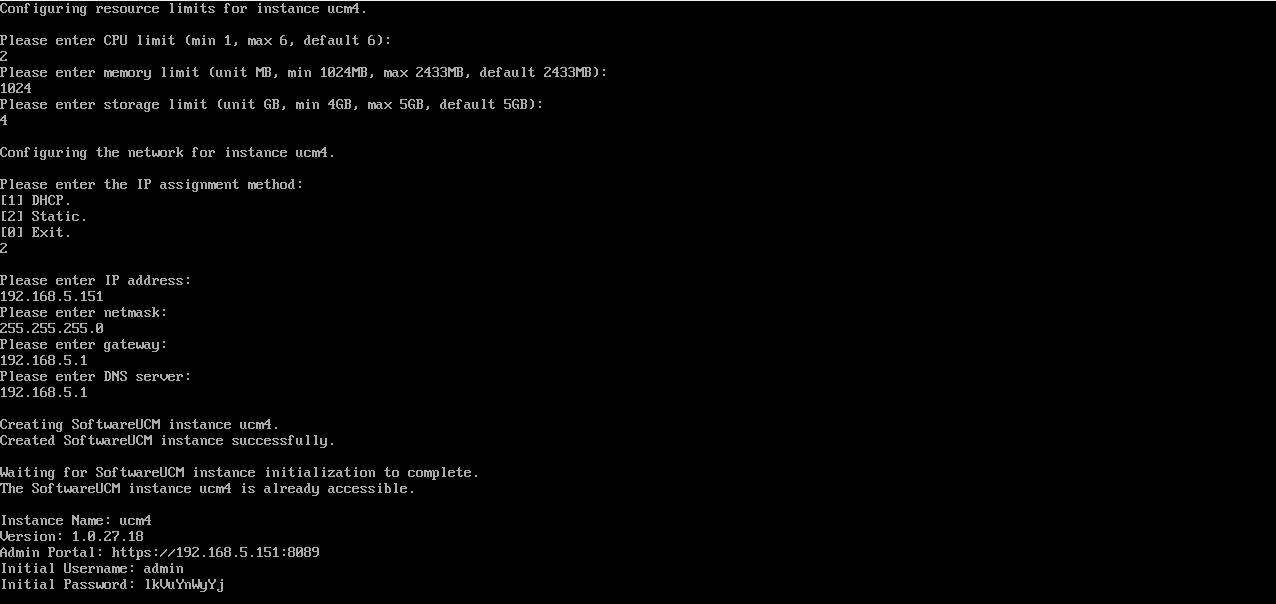
- Configure the network and resource limits settings for the initial instance (ucm3).
- Once the initial SoftwareUCM instance (ucm3) has its resource information and network information updated, creating a second instance will switch the SoftwareUCM from Single-mode to Multi-tenant mode.
- Create a new SoftwareUCM instance (ucm4), configure its network settings, and define its resources ( number of CPUs to use , RAM, and memory)
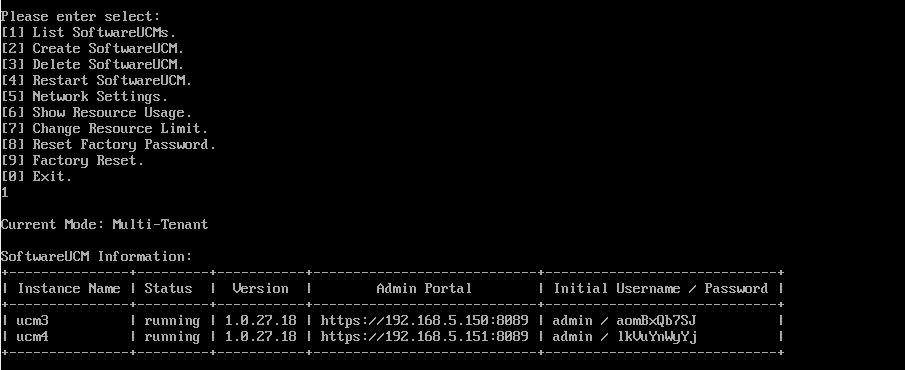
- When both instances are created, enter “1” to list SoftwareUCM instances.
Delete SoftwareUCM Instance
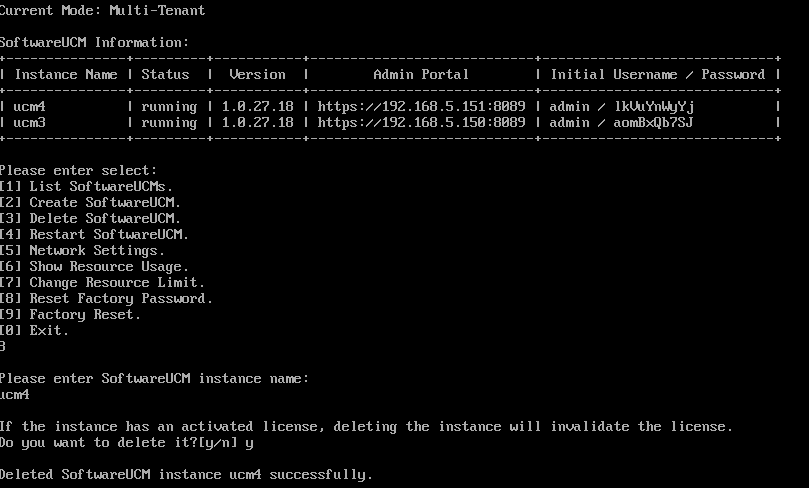
- To delete a SoftwareUCM instance, enter option “1” to list all SoftwareUCM instances.
- Enter option “3” to choose the SoftwareUCM instance to delete.
- Type of the name of the SoftwareUCM instance to be deleted and press Enter.