


OVERVIEW
The GXW42XX V2 high-density FXS gateway series enables businesses of all sizes to create a cost-effective hybrid IP and analog telephone system that offers the benefits of VoIP communications and takes advantage of Gigabit speeds while preserving investment in existing analog phones, fax machines, and legacy PBX systems. The GXW42XX V2 series includes 16/24/32/48 FXS ports, and a Gigabit network port, and features broad interoperability with most service providers, soft-switches, and SIP-based environments.
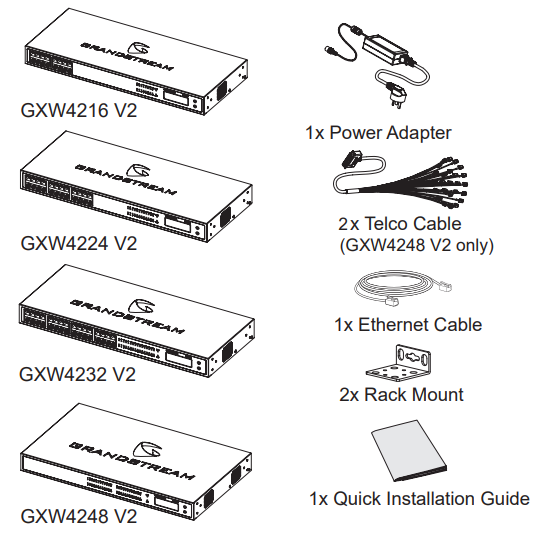
PACKAGE CONTENTS
CONNECTING THE GXW42XX V2 SERIES
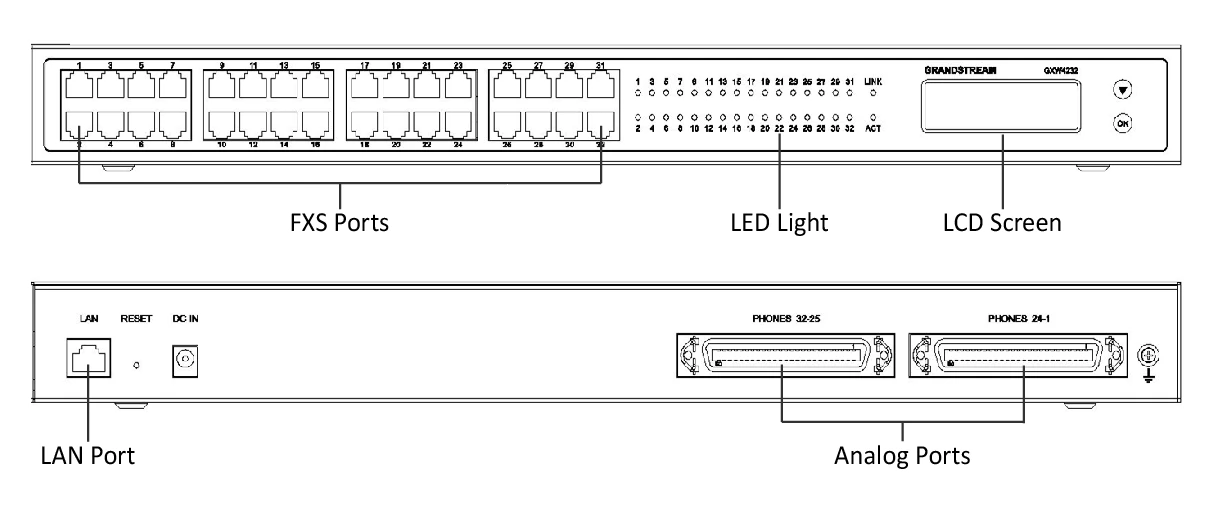
Refer to the illustration below when following the instructions.
CONNECTING THE GATEWAY
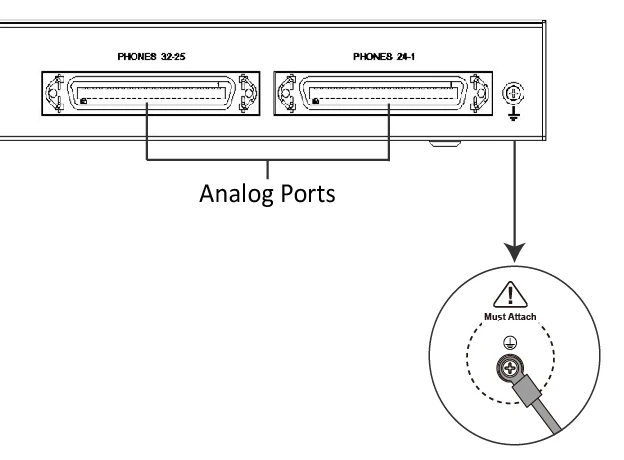
- Connect a standard touch-tone analog telephone (or fax machine) to the FXS analog port on the front panel. Note: The GXW4248 V2 does not have individual FXS ports on the front panel; instead, it uses female RJ21 Telco (Amphenol) connectors on the rear panel. Use the included male RJ21 Telco cable to connect the gateway to analog devices or a patch panel. For more details, see section “Telecom Port Installation.
- Insert the Ethernet cable into the LAN port of GXW42XX V2 and connect the other end of the Ethernet cable to an uplink port (a router, a modem, etc.).
- Using the embedded web server or IVR (Interactive Voice Prompt) menu, you can further configure the gateway using either a static IP or DHCP.
GXW42XX V2 CONFIGURATION
Configure using Interactive Voice Prompt
From the analog phone, press *** to get into the IVR menu. Follow the voice instruction, and configure the setting.
Configure using embedded Web server
- From the analog phone, press *** to get into the IVR menu. Enter option 002 to obtain the Gateway’s IP address.
- Type the device’s IP address in your PC browser.
- Log in using the password printed on the label to configure the gateway.
You will need the following information to configure the GXW42XX V2 series via the web browser:
- IP address, subnet mask, and gateway IP if using static IP.
- Each SIP server and/or Outbound Proxy FQDN or IP address for one Profile (4 in total).
- User subscriber information: User ID, Authentication ID, Password under FXS port label.
- Please contact your ITSP for additional settings that may be necessary to configure the device.
TELECOM PORT INSTALLATION
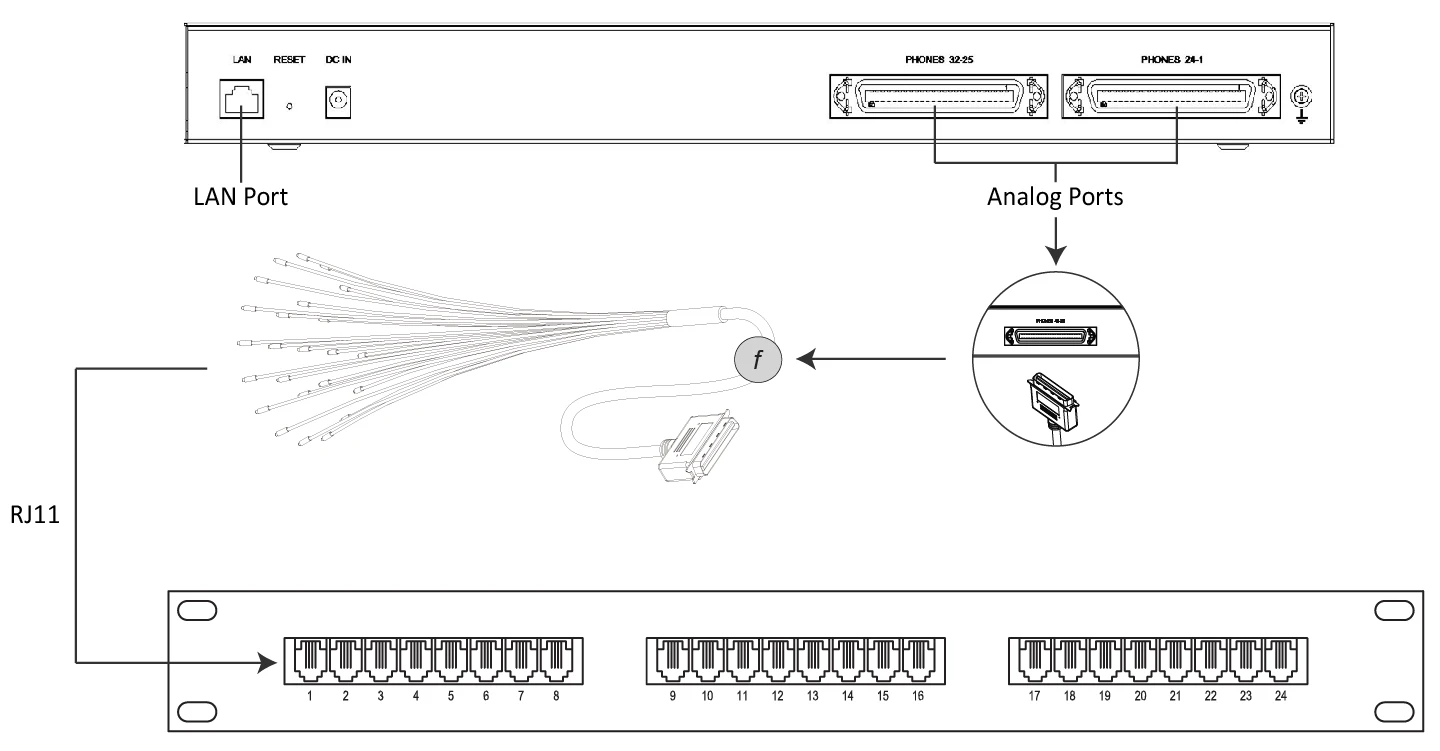
GXW42XX V2 uses a 50-pin female RJ21 Telco (Amphenol) port as an alternative interface (for GXW4248 V2, the Telco port is mandatory) for connecting analog devices such as telephones or fax machines.
When installing the Telco port, a standard male RJ21 Telco Amphenol 50-pin 25-pair cable is required (included with the GXW4248 V2 package only). The cable can be connected to an RJ11 patch panel, which helps organize wiring in most installation scenarios.
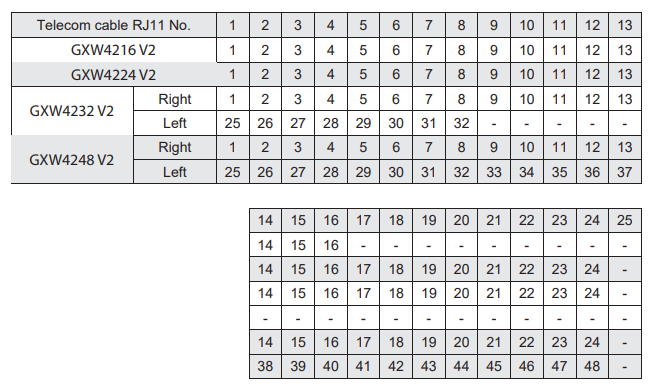
The following table shows the correspondent relation between the No. of each Telco cable’s RJ11 crystal head and the real FXS port number of GXW42XX V2.
To ensure proper lightning protection, install a lightning rod, reliably ground the device, and use a surge protection device as pictured below.
For Certification, Warranty, and RMA information, please visit
www.grandstream.com