


Overview
The GWN7660E is an enterprise-grade Wi-Fi 6 access point that allows businesses to build next-generation Wi-Fi networks for high-density environments. It offers 2×2:2 MU-MIMO technology on the 2.4G band and 3×3:2 MU-MIMO on the 5G band as well as a sophisticated antenna design and uses XTRA Range technology with beamforming and OFDMA technology for maximum network throughput and expanded Wi-Fi coverage range. To ensure easy installation and management, the GWN7660E uses a controller-less distributed network management design in which the controller is embedded within the product’s Web user interface. The GWN7660E is also supported by GDMS and GWN Manager, Grandstream’s cloud and on-premise Wi-Fi management platform. It is the ideal Wi-Fi AP for voice-over-Wi-Fi deployments and offers a seamless connection with Grandstream’s Wi-Fi capable IP phones. With support for advanced QoS, low-latency real-time applications, mesh networks, captive portals, 256 concurrent clients per AP and Gigabit network ports with PoE/ PoE+, GWN7660E is an ideal Wi-Fi access point for medium wireless network deployments with medium-to-high user density.
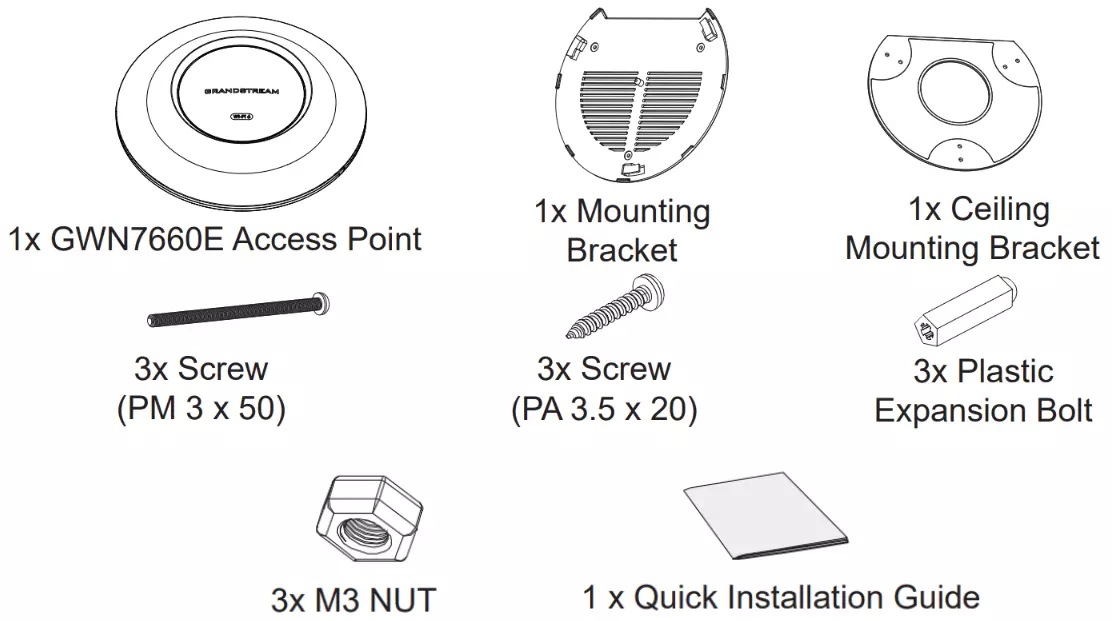
Package Contents
GWN7660E Ports
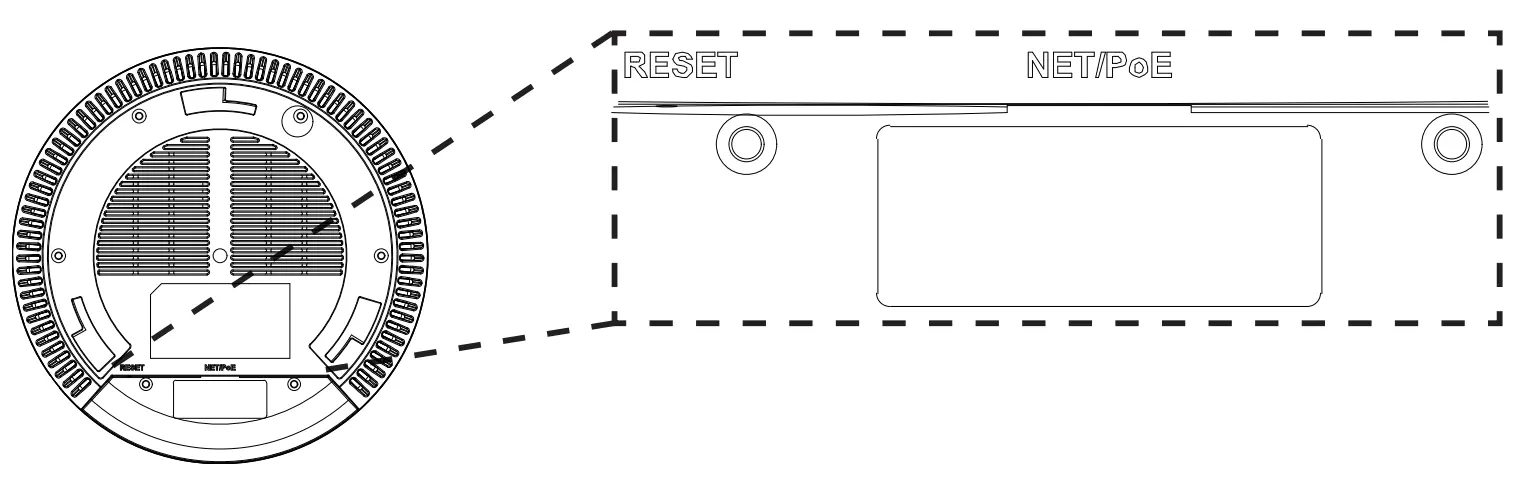
Port | Description |
NET/POE 1G | Ethernet RJ45 port (10Mbps /100Mbps /1Gbps) supporting PoE/PoE+. |
RESET | Factory reset button. |
GWN7660E Ports
Powering and Connecting the GWN7660E
GWN7660E can be powered on using PoE/PoE+ switch using the following steps:
Step 1: Plug an RJ45 Ethernet cable into the network port of GWN7660E.
Step 2: Plug the other end into the uplink port of the power over the Ethernet (PoE/PoE+) switch.

Hardware Installation
GWN7660E can be mounted on the wall or ceiling, Please refer to the following steps for the appropriate installation.
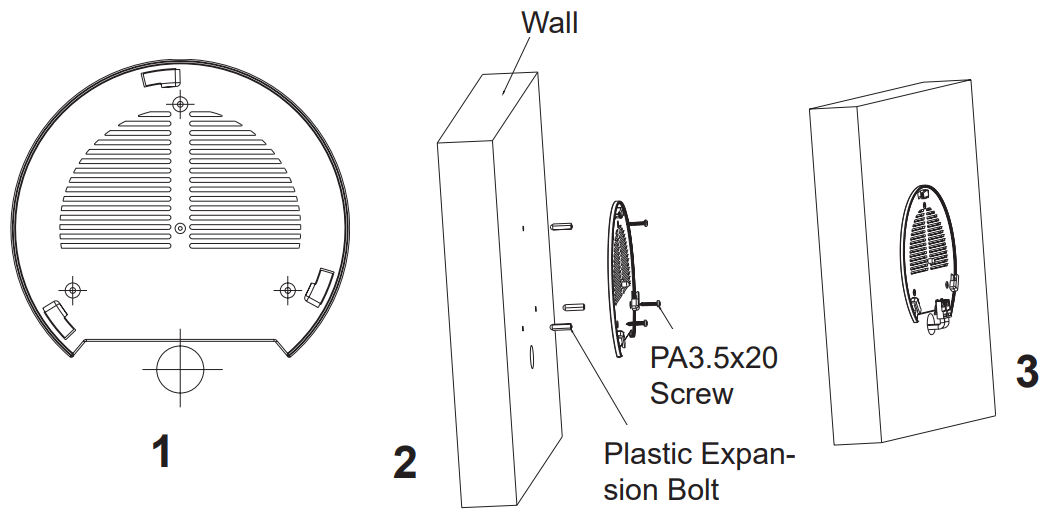
Wall Mount
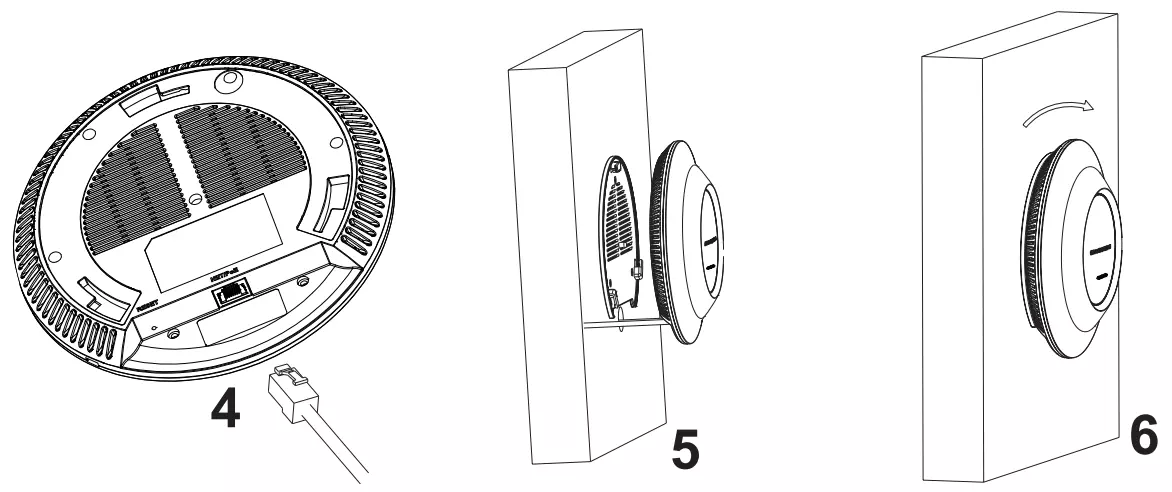
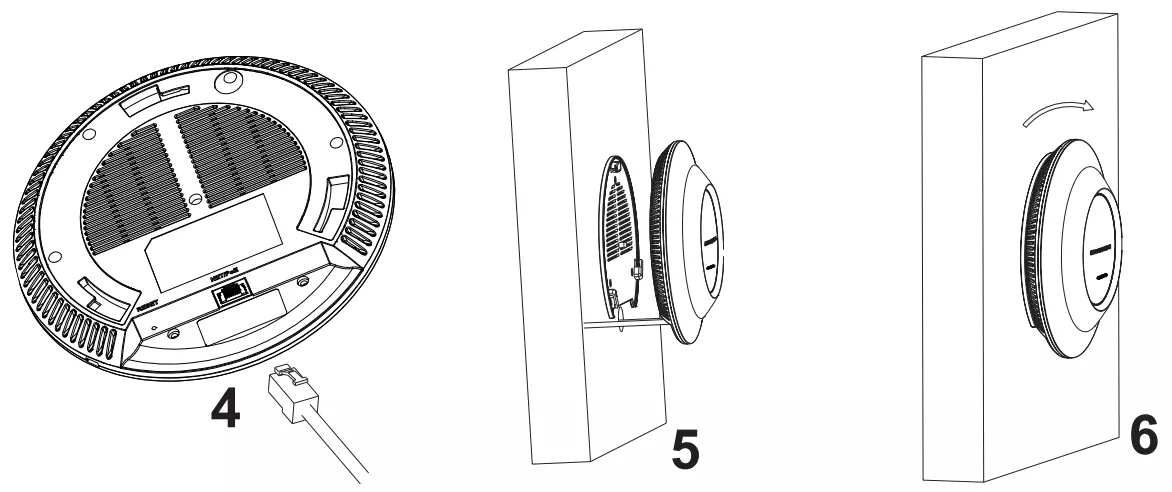
- Connect the Ethernet cable (RJ45) to the correct ports of your GWN7660E.
- Align the arrow on the GWN7660E AP with the arrow on the locking tab of the mounting bracket and ensure that your GWN is firmly seated on the mounting bracket.
- Turn the GWN clockwise until it locks into place and fits the locking tab.
- Connect the power cable and the Ethernet cable (RJ45) to the correct ports of your GWN7660E.
- Align the arrow on the GWN7660E AP with the arrow on the locking tab of the mounting bracket and ensure that your GWN7660E is firmly seated on the mounting bracket.
- Turn the GWN7660E clockwise until it locks into place and fits the locking tab.
Ceiling Mount
- Remove the ceiling tile.
- Place the ceiling backing plate in the center of the ceiling tile and mark the mounting screw holes (screw holes DIA 5.5mm, reticle hole DIA 25mm).
- Insert the screws through the mounting bracket.
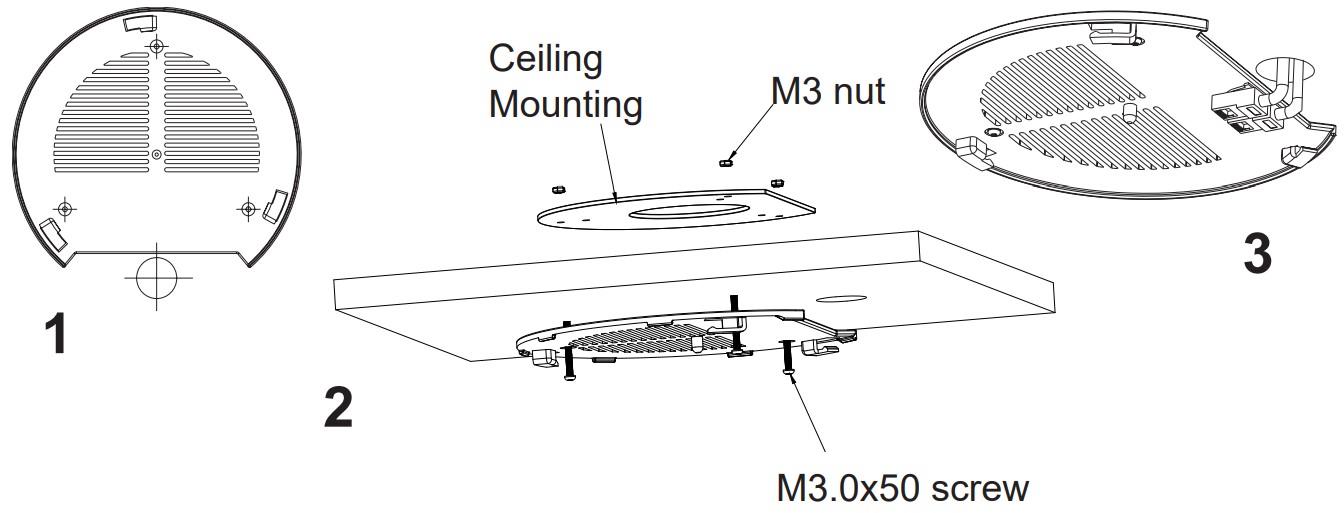
- Connect the Ethernet cable (RJ45) to the correct ports of your GWN7660E.
- Align the arrow on the GWN7660E with the arrow on the locking tab of the mounting bracket and ensure that your GWN is firmly seated on the mounting bracket and connect the network and power cables.
- Turn the GWN clockwise until it locks into place and fits the locking tab.
CONNECT TO GWN7660E DEFAULT Wi-Fi NETWORK
GWN7660E can be used as a standalone access point out of the box, or after a factory reset with Wi-Fi enabled by default.
After powering the GWN7660E and connecting it to the network, GWN7660E will broadcast a default SSID based on its MAC address GWN[MAC’s last 6 digits], and a random password.
ACCESSING THE CONFIGURATION INTERFACE
A computer connected to the GWN7660E’s SSID, or to the same network as the GWN7660E can discover and access its configuration interface using one of the below methods:
Method 1: Discover GWN7660E using its MAC Address
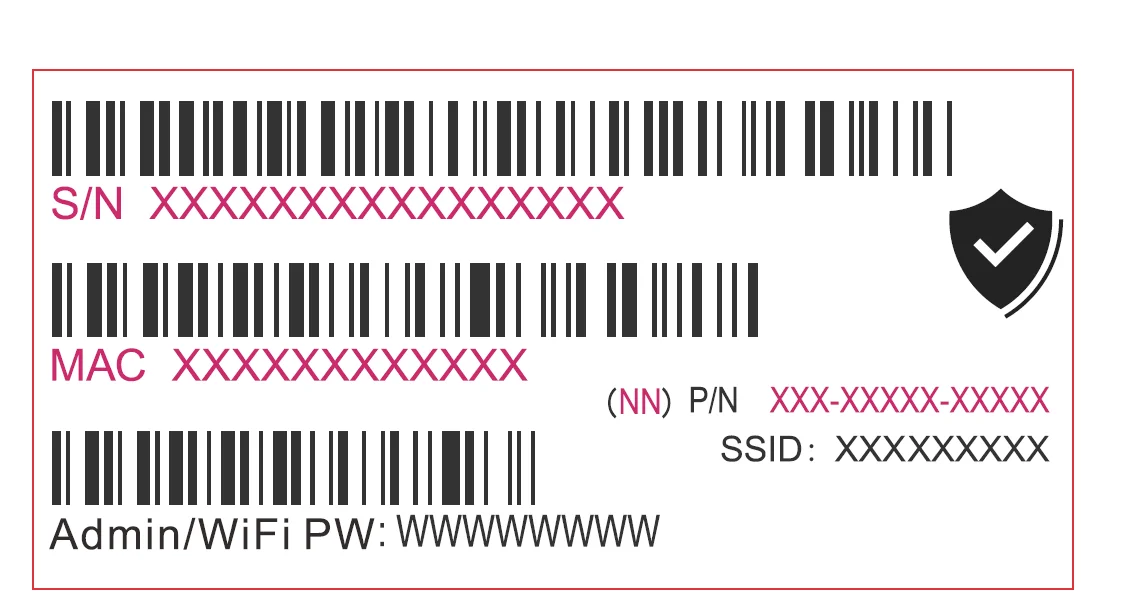
- Locate the MAC address on the MAC tag of the unit, which is on the underside of the device, or on the package.
- From a computer connected to the same network as the GWN7660E, type in the following address using GWN7660E’s MAC address on your browser: https://gwn_<mac>.local
Example: If a GWN7660E has the MAC address C0:74:AD:8B:4E:28, this unit can be accessed by typing https://gwn_c074ad8b4e28.local on the browser.
Method 2: Discover GWN7660E using GWN Discovery Tool
- Download and install GWN Discovery Tool from the following link:
https://www.grandstream.com/tools/GWNDiscoveryTool.zip - Open the GWN DiscoveryTool, and click on Scan.
- The tool will discover all GWN76XX Access Points connected on the network showing their MAC and IP addresses.
- Click on Manage Device to be redirected directly to the GWN7660E’s configuration interface, or type in manually the displayed IP address on your browser.
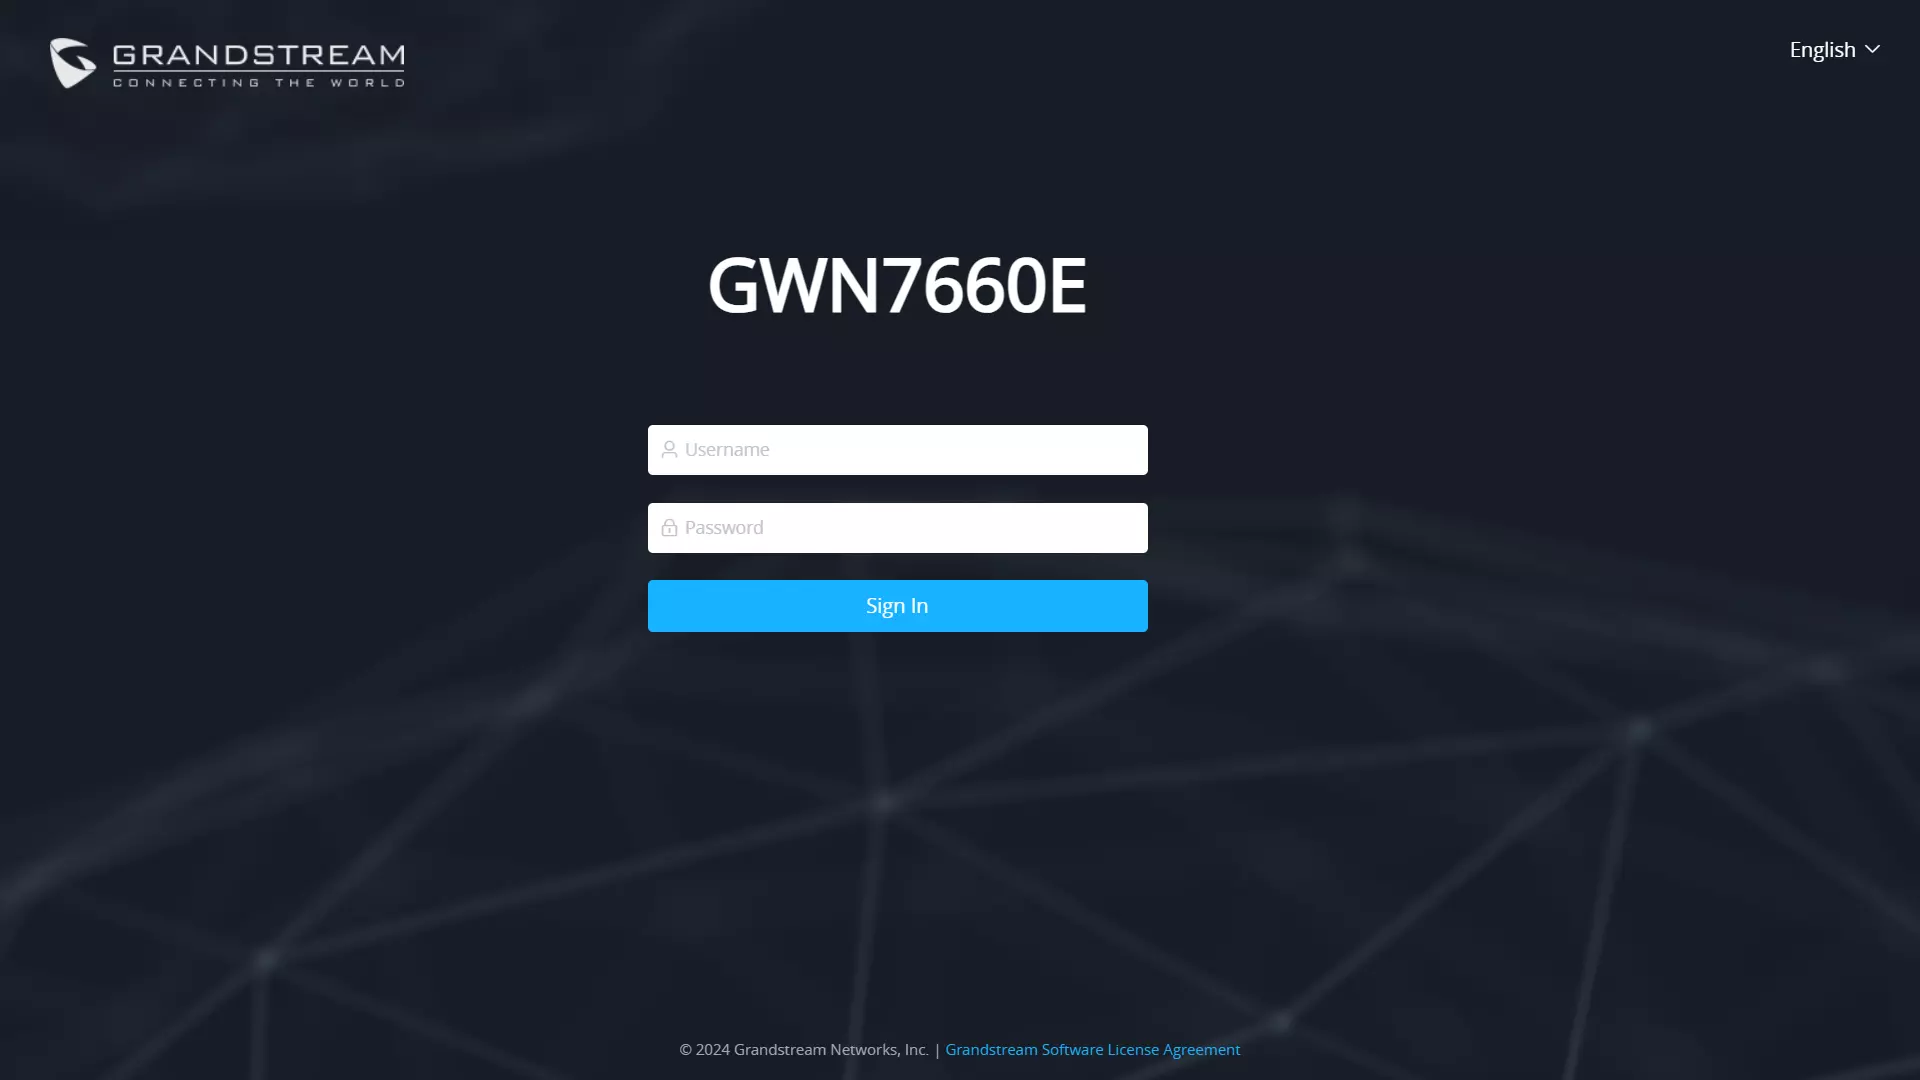
Enter username and password to log in. (The default administrator username is “admin” and the default random password can be found on the sticker on the GWN7660E).
Refer to online documents and FAQ for more detailed information:
https://www.grandstream.com/our-products

For Certification, Warranty, and RMA information, please visit www.grandstream.com