


INTRODUCTION
The GDS Manager is a management software for the GDS37xx series based on a Server/Client architecture, providing RFID card management, basic reports for door entrance, and attendance management.
The GDS Manager is a client–server model, which is a distributed application structure that partitions tasks or workloads between the providers of a resource or service, called Server, and service requesters, called Client.
Often, clients and servers communicate over a computer network on separate hardware, but both client and server may reside in the same system. A server host runs one or more server programs that share their resources with clients. A client does not share any of its resources, but requests a server’s content or service function.
Clients, therefore, initiate communication sessions with servers that await incoming requests. Examples of computer applications that use the client–server model are Email, network printing, and the World Wide Web.
Installation Guide
Minimum Computer System Requirements
Server:
- Operating System: Windows 2003/2008 Server; Windows XP SP2/SP3; Windows 7 32bit/64bit
- Processor: Intel® Core™ i3; 2.6GHz or above recommended
- Memory Capacity (RAM): 4GB or above
- Hard Drive Capacity: 320 GB (depending on video recording requirement)
- Graphics Card Type: Discrete Graphics Card (NVIDIA GEFORCE® GTX660 or above recommended)
- Network Adapter: 1000Mbps network adapter
Clients:
- Operating System: Windows XP SP2/SP3; Windows Vista; Windows 7 32bit/64bit; Windows 8
- Processor: Intel® Core 2 Duo ™ or above
- Memory Capacity (RAM): 2GB or above
- Hard Drive Capacity: 120 GB (depending on recording requirement)
- Graphics Card Type: Discrete Graphics Card recommended
- Network Adapter: 100Mbps network adapter, 1000Mbps recommended
Note: UPS is required for the server to prevent database or video record file corruption caused by a power outage.
Download and Install GDS Manager
Users need to download the GDS Manager from the Grandstream Tools Page:
https://www.grandstream.com/support/tools
- Open the GDSManager.exe file in the downloaded package to start installing the GDS Manager.
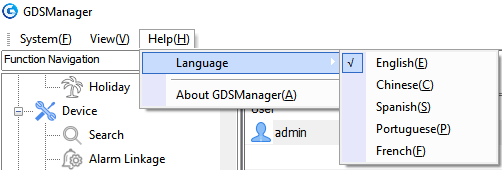
- Select the Language from the available options below:
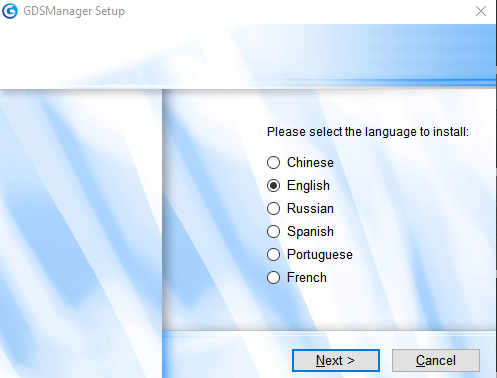
3. Follow instructions to complete the installation.
4. After installation is successful, the GDSServer and GDSManager icons will be shown on the Desktop:

 .
.
Connecting to the GDS Manager
Starting GDS Server
Double-click on the GDS Server icon to start listening for new client connections. The folder icon will be shown on the taskbar. Right-click on it to bring up the server options as shown below.
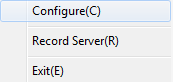
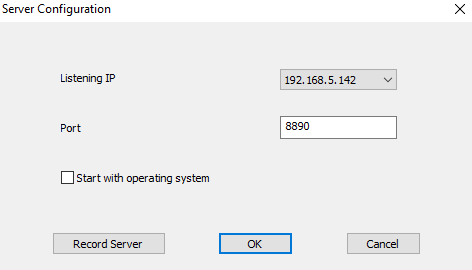
- Configure: Click to display a window showing the Listening IP and Port of the server, as well as an option to start the server with the operating system, and a button for starting the record server, as shown below:
2. Record Server: Start an FTP server to save pictures uploaded by the GDS371x/GDS372x.
3. Exit: Click to quit the GDS Server software.
Starting GDS Manager
The GDS Manager is the client part of the software, which will allow interaction with the GDS37xx through the GDS Server.
To start the GDS Manager, follow the steps below:
- Double-click on the GDS Manager, and the following window will pop up:
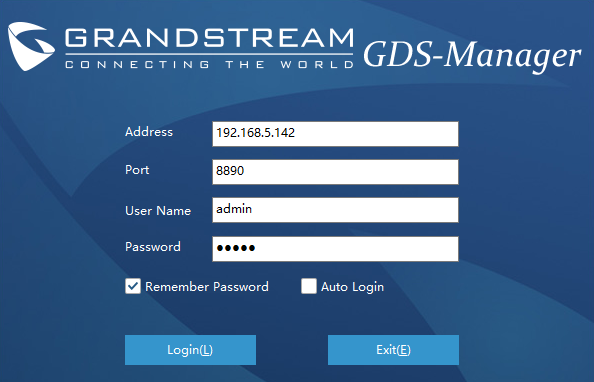
- Address: Enter the IP address or domain of the GDS Server machine.
- Port: Enter the listening port of the GDS Server.
- User Name: Enter the user name to connect to the GDS Manager; by default, it’s admin.
- Password: Enter the password to connect to the GDS Manager; by default, it’s admin.
2. Click Login and the following confirmation window will pop up:
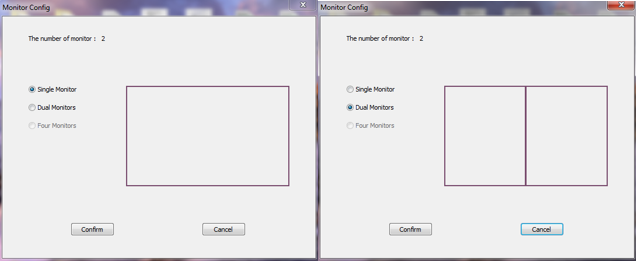
- Select Single Monitor or Dual Monitor to display the GDS Manager on a single screen or two screens, respectively.
- Click Confirm to start the GDS Manager.
GDS MANAGER APPLICATIONS
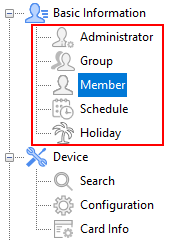
Basic Information
Administrator
The administrator sub-menu allows the admin to change their password and/or create new users.
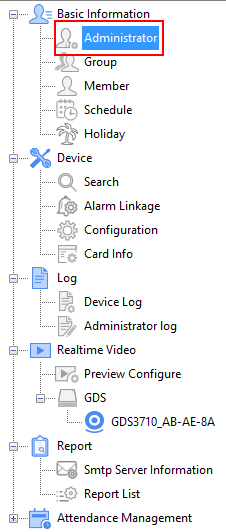
Click on the “Administrator” icon to display the following window.

Admin can create Users and assign respective privileges, which will have access to:
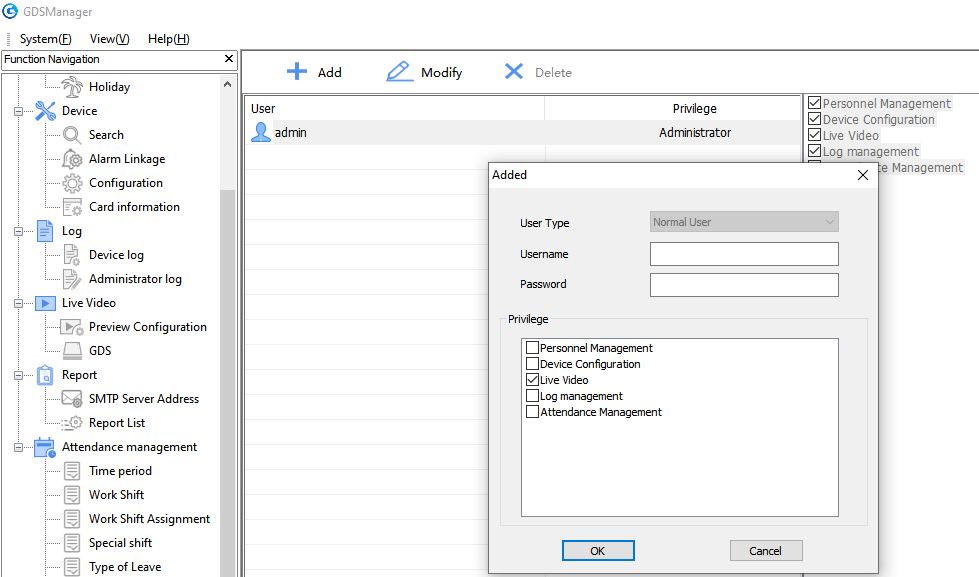
To change the admin password, set the following:
- Enter a new password and click on the “Modify” button.
To create a new user, follow steps below:
- Enter a user name.
- Enter a password.
- Click on the “Plus” (+) button.
Group
Admin can create groups and sub-groups to separate users. This can be done by following these steps:
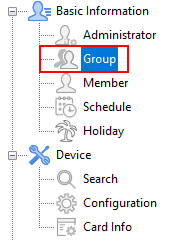
- Click on “Add” as shown below.

2. Enter the “Group Name” and “Parent Group Name” if a parent group is needed.
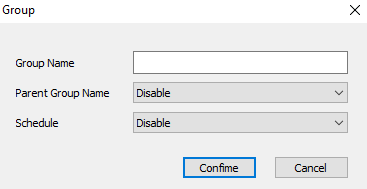
3. Configure the schedule time frames and click on “Confirm” to add the group.
Member
Admin can manage users from the Member menu; he/she can add/delete/synchronize data with the GDS37xx and search for a user.
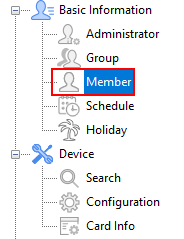
- Click on “Add a new Member” to add a new user, and the following window will pop up to enter the user’s specific information.
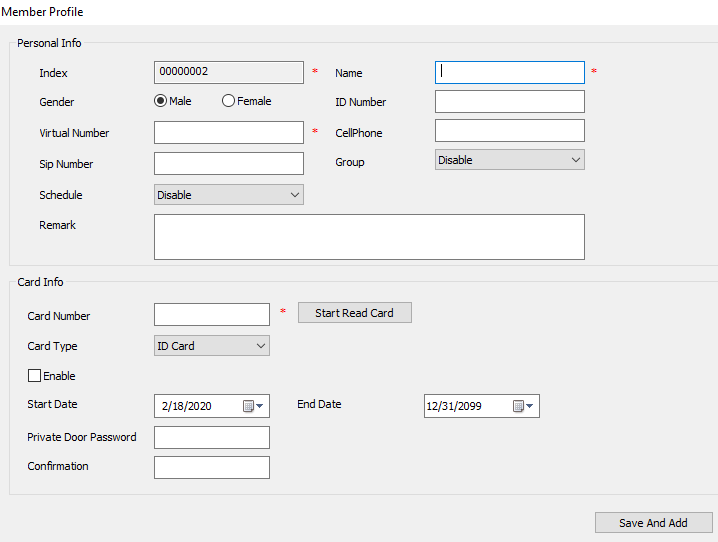
The table below describes the parameters on the member profile:
Field | Description |
Index | The index will be incremented automatically. This field is not editable. |
Name | Enter the user name. |
Gender | Enter the user’s gender:Male or Female. |
ID Number | ID number is a unique number to identify a user. |
Virtual Number | When dialing directly from the keypad, the GDS accept only Virtual number to identify a user, once the Virtual number is typed followed by # key, the Sip Number will be dialed. |
Cell Phone | Enter the cell phone number of the user. |
SIP Number | The SIP Number is mapped with virtual number, once the virtual number is dialed the GDS37xx will send an INVITE to the SIP Number. |
Group | Enter the group where the user belongs. |
Schedule | Configures the schedule time frames which will be assigned to the users for door system usage |
Remark | Enter some remarks regarding the current user. |
Card Number | Enter the RFID Card number (this is the number written on the RFID card). |
Start Read Card | Click Start Read Card, then sweep RFID card on the USB card reader to read the number registered on the RFID card. |
Card Type | Specifies the Card Type. |
Enable | Click on this filed to enable this user. |
Start Date | Enter date when the card will start being active. |
End Date | Enter date when the card will end being active. |
Enter the specific PIN code to unlock the door (Digits only) | |
Confirmation | Confirm the PIN code password |
2. Select a user and click on “Delete a Member” to delete the selected entry.
3. Click on “Batch Add Card”, the following window will pop up.
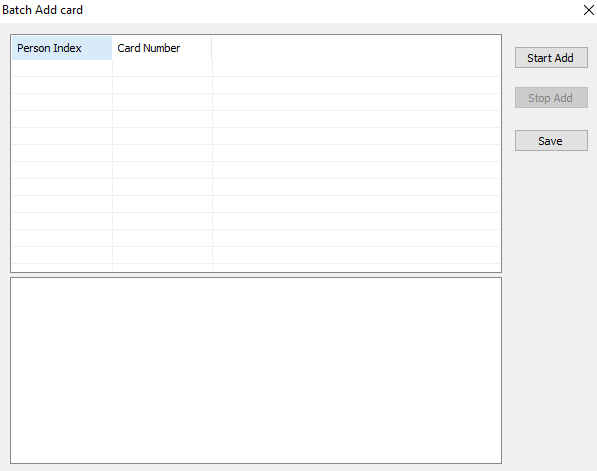
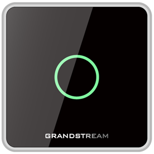
a. Plug the USB Card Reader that can be purchased from Grandstream as shown below.
b. Click on “Start Add”.
c. Start swiping RFID cards, and the (“Person Index”, ”Card Number”) fields will be incremented.
d. Click on “Stop Add” once finished adding new cards.
e. Click on “Save” to save the added cards.
4. Select a record and click on “Push To..” to copy the selected user to the GDS37xx.
5. Select a batch of users that will have the same configuration, and then click on “Batch Modify“. The following window will pop up.
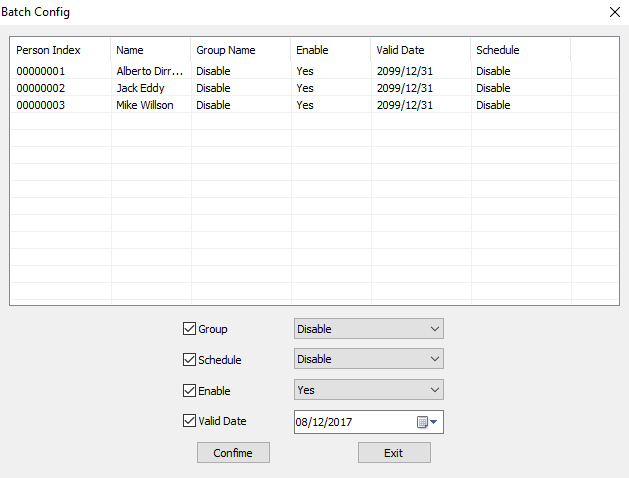
a. Check the “Group” checkbox and select the Group to apply to all users.
b. Check the “Schedule” checkbox and select the Schedule to apply to all users.
c. Check the “Enable” checkbox to enable the users.
d. Check the “Valid Date” checkbox to set a validity date for all users.
6. Select users whose configuration needs to be saved, then click on “Export”. The following window will pop up.
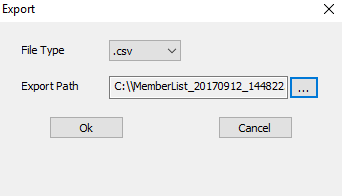
a. Click on the three dots icon (…) to browse directories where to store the users’ data.
b. Click “OK” to save the data.
7. To import user configuration data, click on “Import”, then select the CSV file.
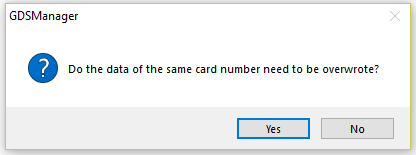
a. A pop-up window will appear to confirm the information uploaded and the overriding of the existing member
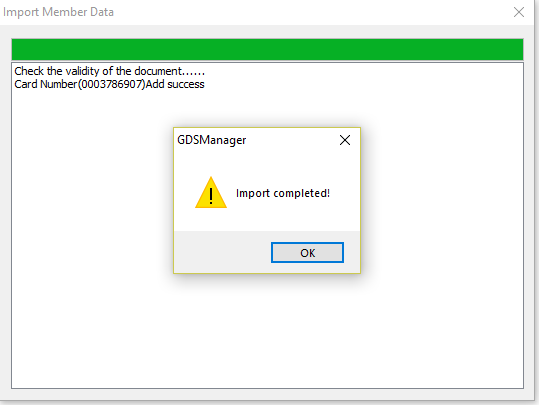
b. And the following window will appear, indicating the success of the import.
8. Users can search for members using the search bar to filter with different methods:
- Person Index
- Name
- Group Name
- Virtual Number
- Card Number

Schedule
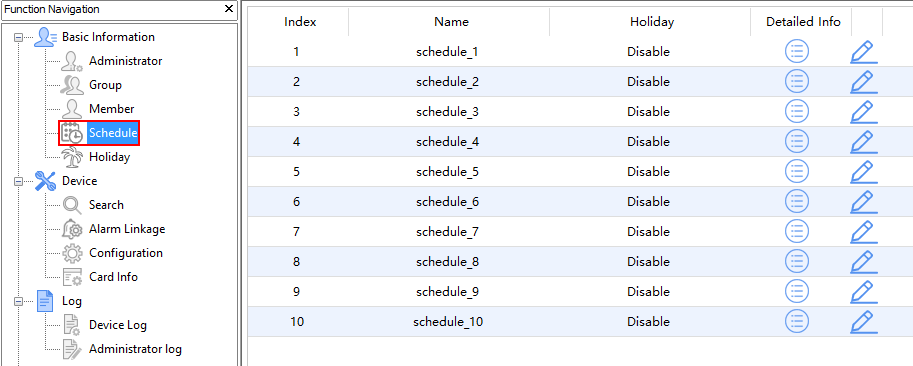
Admin can schedule time frames that will be assigned to the users for door system usage. Outside the configured time intervals, the GDS will deny users’ access.
Click on the pencil “edit” icon to edit the schedules or on the “info” icon for schedule details.
Holiday
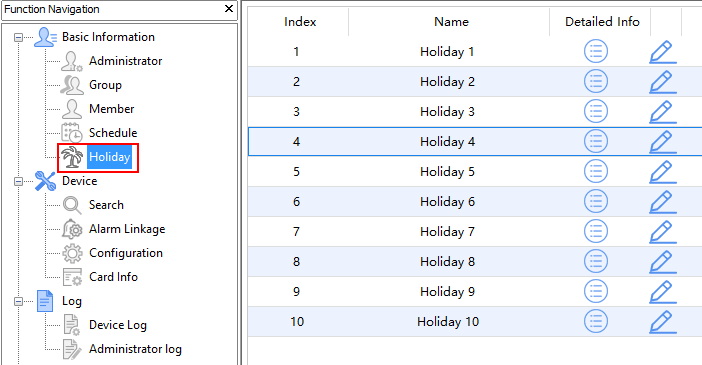
Admin can manage holidays, which will be assigned to the users for door system usage.
Click on the pencil “edit” icon to edit the holidays or on the “info” icon for holiday details
Device
This sub-menu allows users to search the available GDS37xx and prepare the configurations.
Search
Click on “Search” to perform a search for all GDS37xx available in the local network. The following window will be shown.
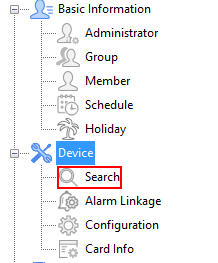

- Click “Search” to search for available GDSs
- Select a GDS37xx and click on “Add” to start configuring the selected GDS37xx from the GDS Manager.
- Click “Exit” to quit the search window.
Alarm Linkage
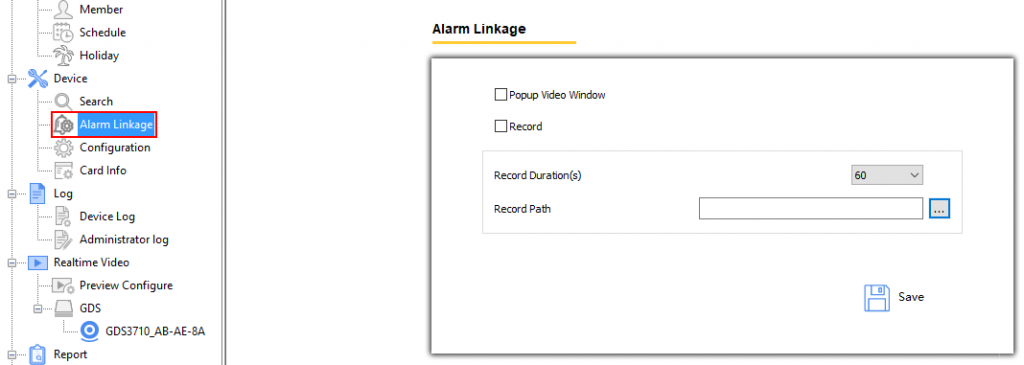
This feature offers the ability to pop up a video stream window on or to record up to 60 seconds of video when the alarm is triggered on the GDS37XX. This applies to: Motion Detection; Tamper; Wrong PIN input; DI; Hostage; Alarm Testing; Non-Scheduled Access Alarm.
Configuration
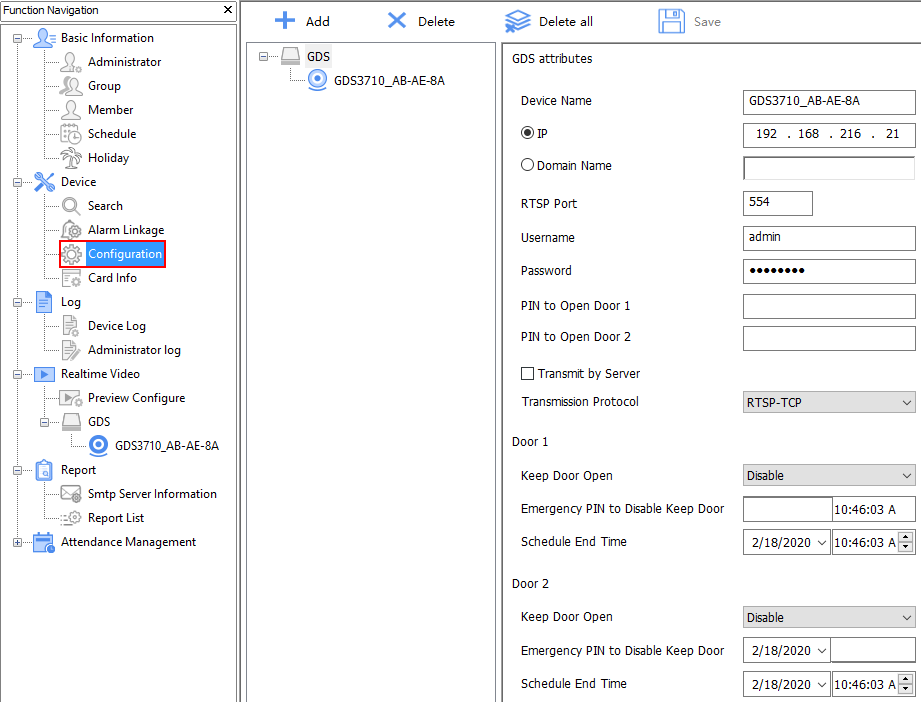
The configuration menu allows users to add manually available GDS37xx devices on the network to the GDS Manager.
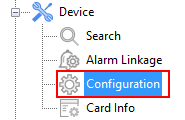
- Click on “Configuration”, and the following window will pop up.
- Click on “Add” to add devices.
- Enter the “Device Name”, “IP”, or “Domain Name” and “User/pass” as well as the RTSP port.
- Click “Ok” to add the new device.
- Select a device and click on “Delete” to delete the selected device.
- Click on “Delete all” to delete all the available devices.
- User can now enter the Remote PIN set on the GDS37xx for each door on “PIN to Open Door 1” and “PIN to Open Door 2” fields. (This field isn’t synced with the GDS37xx and needs to be entered manually).
- The Keep Door Open feature can now be enabled and synced from the GDSManager immediately.
Card Info
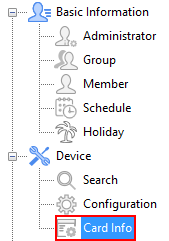
Click on “Card Info” to copy card information stored on the GDS37xx to the GDS Manager.
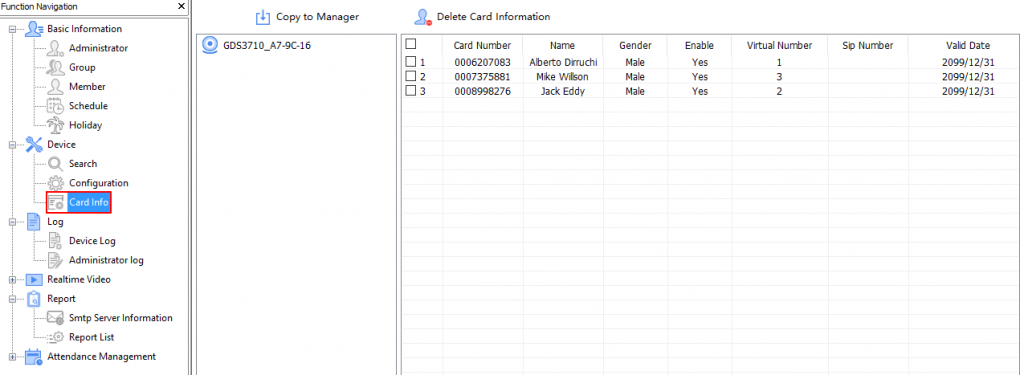
- Select the User to be added to the GDS Manager, then click on “Copy to Manager”.
- Select the User to delete from the GDS37xx, then click on “Delete Card Information”.
- Click on “Exit” to quit the device card menu.
Log
This sub-menu provides access to GDS37xx and GDS Manager logs.
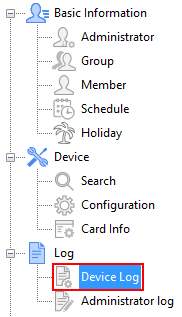
Device Log
Click on “Device Log” to retrieve logs of GDS37xx operations.
The following window will be shown to filter logs.
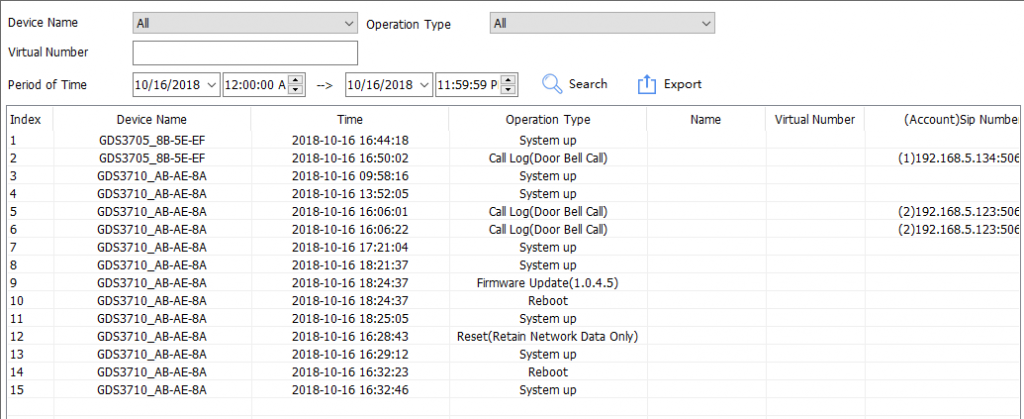
- Filter can be done using 4 methods:
- Device Name: Select the device name from the drop-down list.
- Operation Type: 24 operations are available to filter with.
- All: Display all available logs.
- Visiting Log: Display logs related to visiting logs
- Open Door via Card: Display logs related to opening door by RFID card.
- Open Door via PIN: Display logs related to opening door by password.
- Open Door by DI: Display logs related to opening door via digit input.
- Keep Door Open (Immediate): Display logs related to the immediate keep door open.
- Keep Door Open (Scheduled): Display logs related to the scheduled keep door open.
- HTTP API Open Door: Display logs when opening the door using the HTTP API.
- Call Log: Display logs related to call logs.
- Motion Detection: Display logs related to motion detection.
- Sensor Alarm: Display logs related to sensor alarm.
- Vandalism: Display logs related to dismantling by force (GDS37xx will trigger alarms set on “Tamper alarm” when trying to remove GDS from the installation bracket).
- Hostage Alarm: Display logs related to hostage alarm (GDS37xx will trigger alarms set on hostage alarm when users enter the password on the GDS3705/GDS3710/GDS3725 keypad on an urgent situation).
- Invalid Password: Display logs related to input error alarms (GDS37xx will trigger alarm actions every 5 failed attempts).
- Device Temperature: Display logs related to device temperature
- Door or Lock Abnormal: Display logs related to abnormal door opening (not triggered via PINs/Card/DI)
- System up: Display logs related to device booting up
- Reboot: Display logs related to device rebooting.
- Reset (Clear All Data): Display logs related to a full factory reset.
- Reset (Retain Network Data Only): Display logs related to the unit factory reset, except network data.
- Reset (Retain Only Card Information): Display logs related to the unit factory reset, except card information.
- Reset (Retain Network Data and Card Information): Display logs related to the unit factory reset, except network data and card information.
- Reset (Wiegand): Display logs related to the unit’s hard factory reset using the Wiegand cable.
- Config Update: Displays logs related to configuration update.
- Firmware Update: Display logs related to firmware update.
- Non-Scheduled Access: Display logs related to when a legitimate users access the door outside of the configured schedule.
- Unauthorized door opening attempt: Display logs related to opening door via non-registered digits input.
- Unauthorized door opening attempt(over Wiegand): Display logs related to opening door via non-registered cards.
- Virtual Number: Enter the Virtual Number of the user to filter with.
- Period of time: Select the period of time
- Click “Search” to start searching for logs according to the search criteria.
- Click on “Export” to export the displayed logs.
Administrator Log
Click on “Administrator log” to retrieve logs of GDS Manager operations.
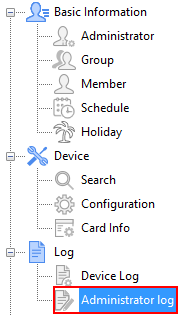
The following window will be shown to search for GDS Manager logs.
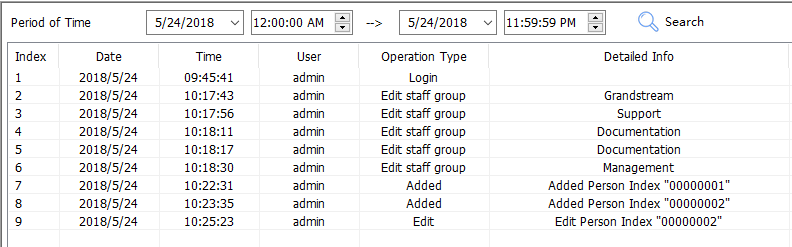
This window displays information logs performed by the GDS Manager, such as login, adding/deleting cards, modifying users, adding/deleting devices…
Realtime Video
Click on “Realtime Video” to list available GDS371x/GDS372x streams.
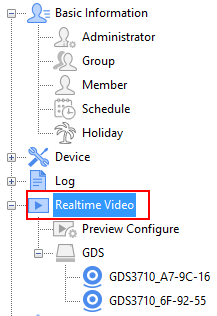
Users need to add GDS371x/GDS372x to the GDS Manager first from the “Search” sub menu to display the stream on the “Realtime Video” menu.
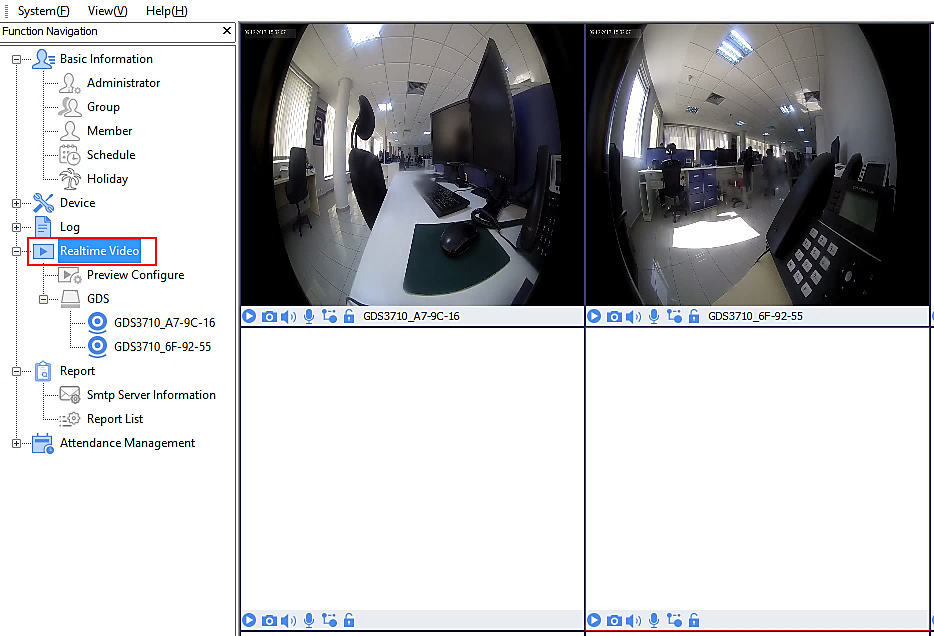
The following screenshot displays the video stream of the connected GDS371x/GDS372x. Users can start/stop the live stream, take a stream’s capture, enable/disable the sound, enable two–way audio, choose the stream, and open the door remotely using the icons in the command bar below:  .
.
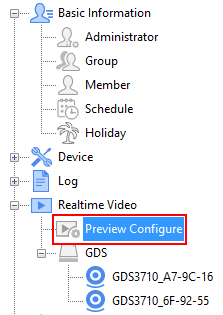
Preview Configure
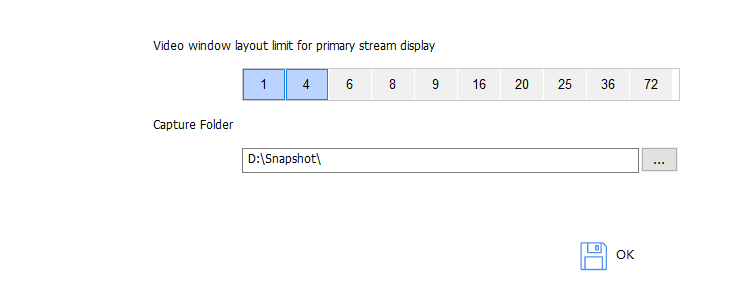
Click on “Preview Configure” to select the file where to store screenshots taken from the GDS37xx.
The following window will pop up to select the directory where to store screenshots taken from the GDS.
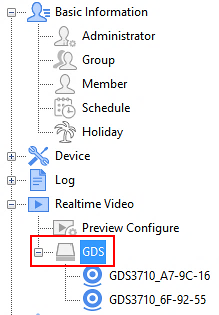
GDS
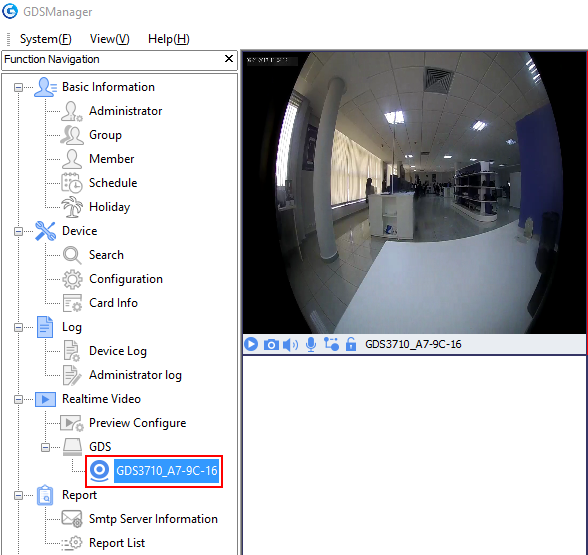
The “GDS” sub-menu displays connected GDS37xx to the GDS Manager added via the “Search” sub menu and their video stream.
Report
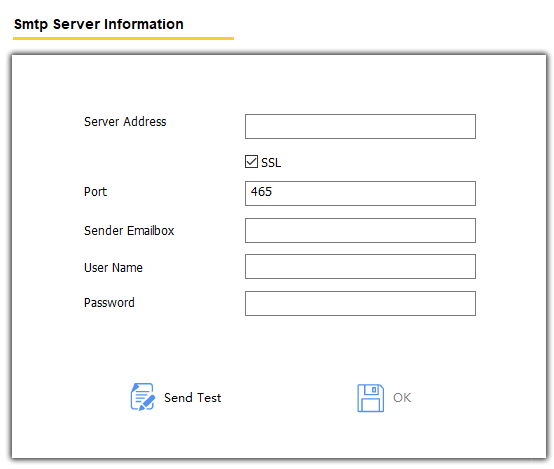
This menu allows users to configure the SMTP server information and access to the report list.
SMTP Server Information
The SMTP server sub menu allows users to configure their SMTP server address, port, sender Emailbox and to send a test text.
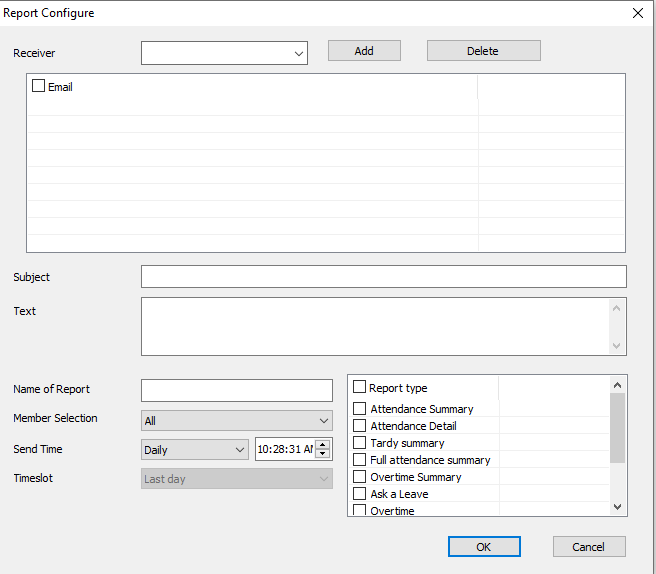
Report List
The report list sub menu allows users to configure the report list, including the report’s name, email, subject, text, send period time (daily, weekly, and monthly), and report type (attendance Summary, Overtime, etc).
Click on “Add” to access the report list configuration as displayed on the following screenshot.
Attendance Management
The “Attendance Management” sub menu displays attendance records, as well as work shift, vacation, and time frame.
TimeFrame
Click on “Add” under “Timeframe” in order to set start and end work time and other time properties as shown below.
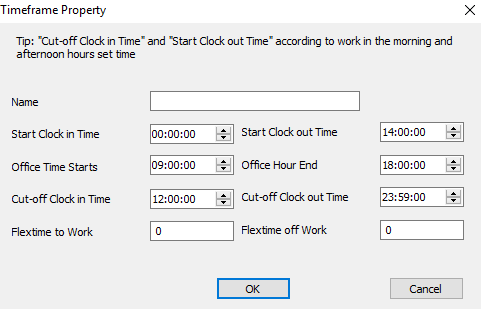
The table below describes all the parameters that can be configured in this window:
Field | Description |
Timeframe Name | Enter the Time Frame name. |
Start Clock-in time | Enter the time when users are allowed to start check-out. |
Start Clock -out time | Enter the office start working time. |
Office Time Starts | Enter the office end working time. |
Office Hour End | Enter the end check-in time (member will be considered as absent after this time). |
Cut-off-Clock-in Time | Enter the allowed leaving early time. When set to “0”, users will only be allowed to leave after “Office Hour End”. |
Cut-off-Clock-out Time | Enter end check-out time (no check-out will be accepted after this time). |
Flextime to Work | Enter the allowed late time. When set to “0”, users will be considered absent after the configured “Office Time Starts “. |
Flextime off Work | Enter the allowed early leaving time. When set to “0”, users will only be allowed to leave after “Office Hour End”. |
Users can also modify or delete the timeframe by clicking on “Modified”, “Deleted”, respectively.

Work Shift
Click on “Add” under “Work Shift” to define a work shift schedule to assign it to users. This can be done by completing the following information.
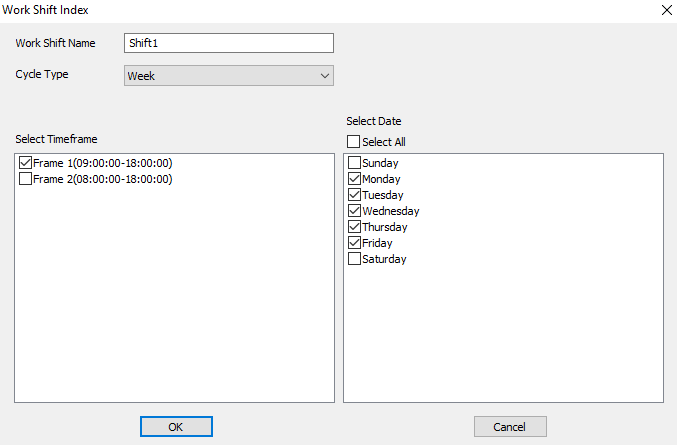
Users need to:
- Set a Work Shift Name.
- Select a Cycle Type, either weekly or monthly.
- Select a timeframe.
- Select days of the shift.
Work Shift Assignment
Click on “Add” under “Work Shift Assignment” to assign a work shift to users as shown below.
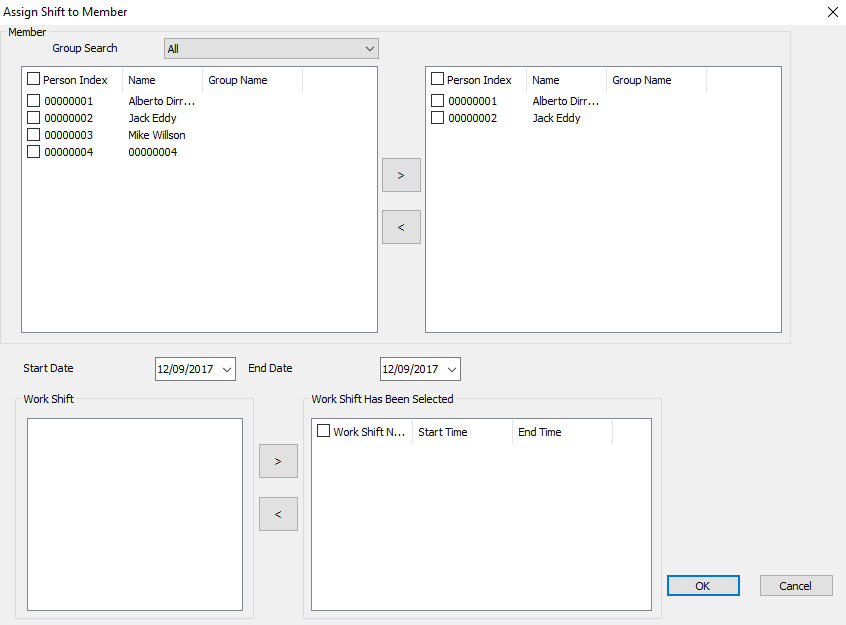
- Select from “Member” users to include for a work shift using the arrows.
- Select a “Start Date” and “End Date” for the validity of the assignment configuration.
- Select a work shift from the list and add it using the arrow.
- Click “OK” to complete the selection.
Special Assignment
Click on “Add” under “Special Assignment” to add a special assignment as shown below.
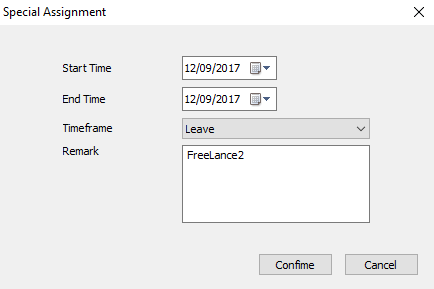
Users need to set:
- “Start Time” of the special assignment.
- “End Time” of the special assignment.
- Assign a specific “Timeframe” or set it to “Leave” to accept all periods.
- Set a “Remark” as a reminder of the purpose of this special assignment.
Vacation Catalog
Click on “Add” to add a new vacation type to assign it to users. The following window will pop up.
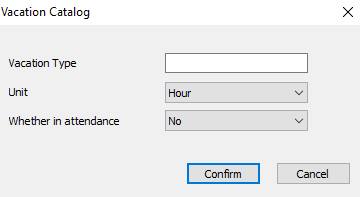
Users need to set:
- Enter a name on the ‘’Vacation Type” to identify the vacation.
- Select the unit of the vacation on “Unit”.
- Set “Whether in attendance” to “Yes” or “No”.
Vacation Apply
Click on “Add” to set the configuration for vacation.
The following buttons allow users to delete, approve, revoke the vacations, export the vacation list, or send an email:

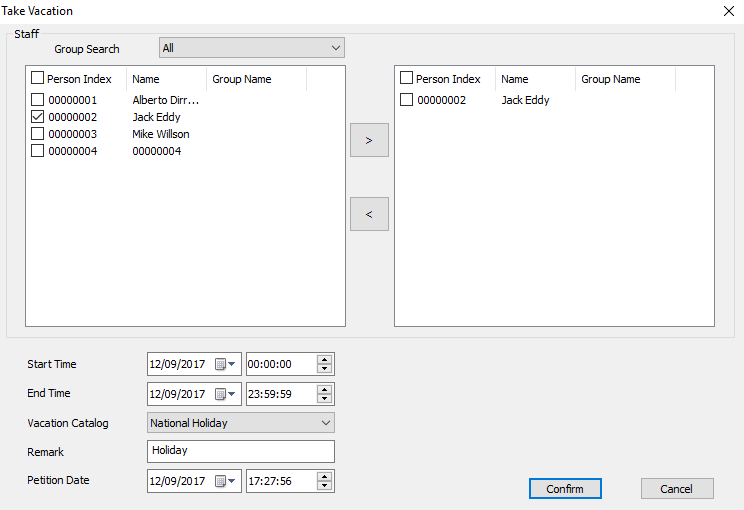
Following configuration needs to be done:
- Select users for vacation using the arrows.
- Enter the “Start Time” for vacation.
- Enter the “End Time” for vacation.
- Enter “Vacation Type”.
- Set a “Reason for Leave”.
- Enter the “Petition Date”.
Overtime
Click on “Add” to configure their users’ overtimes, the overtime sub menu allows also to manage the overtime per users or periods.
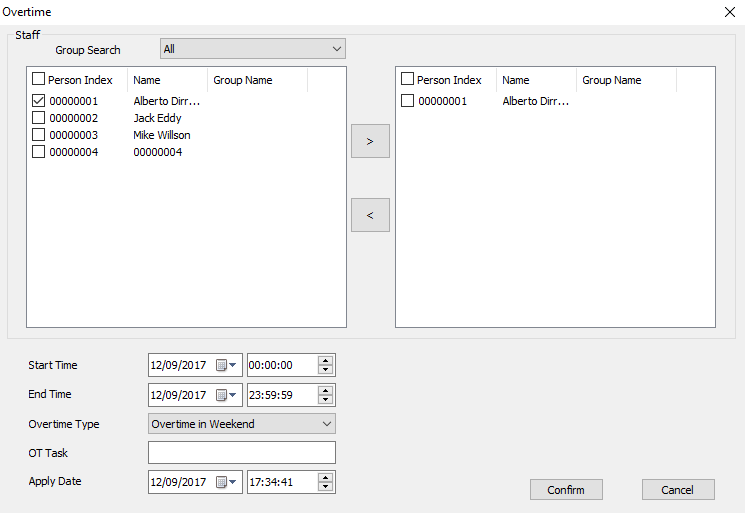
Clock in/out Records
The clock in/out sub-menu shows information about users, Name, Group Name, Date, Check-in and Check-out time, as shown below.
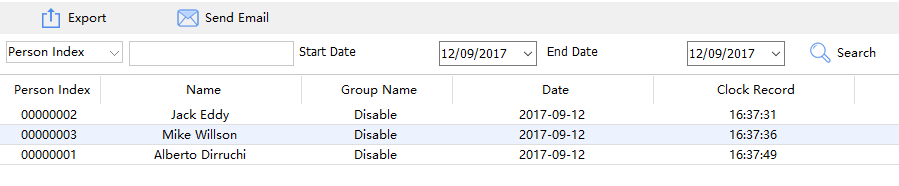
Click on the “Search” icon to retrieve users’ information from the GDS37xx (users may need to wait around 2 minutes for the GDS Manager to retrieve users’ information from the GDS37xx).
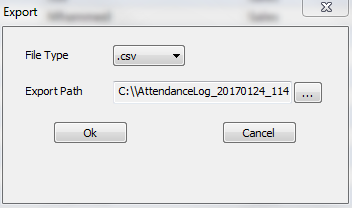
Click on “Export” to export users’ information to the specified path in “.csv” format as shown below.
Makeup Check-In
- Click on “Add” to add a new makeup record, the following window will pop up.
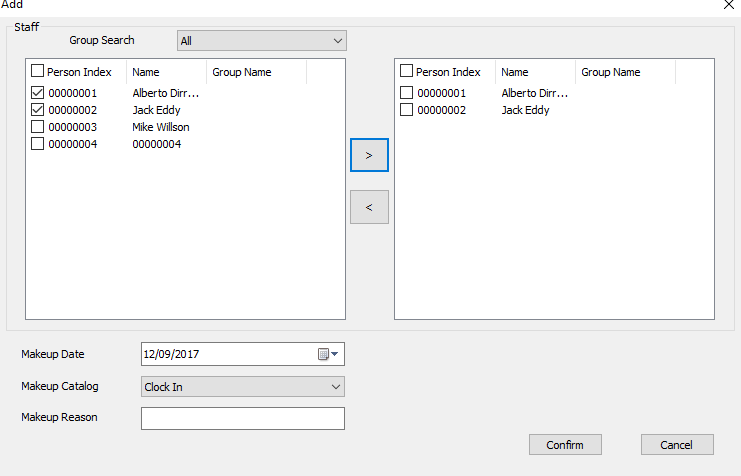
- Following these steps:
- Select users for Makeup record using the arrows.
- Enter the “Makeup Date”.
- Enter the “Makeup Catalog”.
- Enter “Makeup Reason”.
- Click on “Confirm”.
- Select a user and click on “Approve” to set the audit status for a user as pass or rejected, the following window will pop up.
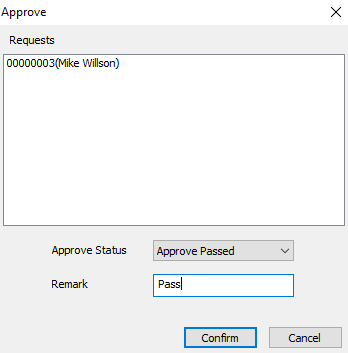
- Set the status of the audit either as “Audit Passed” or as “Audit Rejected”.
- Set the audit reason.
- Select a user, and then click on “Revoke” to revoke the status.
- Select a user and click on “Delete” to delete it from the audit list.
- Select users and click on “Export” to export the selected users in “csv” format.
Attendance Report
This sub menu provides an overview of attendance details, such as attendance summary, late summary, full attendance summary.
Users need to select the desired type of report from “Attendance Detail”, “Attendance Summary”, “Late summary”, “Full Attendance Summary”, then click on the “Search” icon to retrieve data from the GDS37xx.

User can also click on “Export” to export data on the specified path in a “csv” format.
EXPERIENCING THE GDS MANAGER
Please visit our website: https://www.grandstream.com to receive the most up-to-date updates on firmware releases, additional features, FAQs, documentation and news on new products.
We encourage you to browse our product related documentation, FAQ and User and Developer Forum for answers to your general questions. If you have purchased our products through a Grandstream Certified Partner or Reseller, please contact them directly for immediate support.
Our technical support staff is trained and ready to answer all your questions. Contact a technical support member or submit a trouble ticket online to receive in-depth support.
Thank you again for purchasing Grandstream Door Phone System, it will be sure to bring convenience and color to both your business and personal life.
CHANGE LOG
This section documents significant changes from previous versions of user manual for GDS Manager. Only major new features or major document updates are listed here. Minor updates for corrections or editing are not documented here.
- Added support for the new GDS372x series (GDS3725, GDS3726, GDS3727).
- Added support of “Daily” sent time in the report generation. [Report List]
- Added Device log event for unauthorized open door attempt via Wiegand interface. [Device Log]
- Added multi-language support for French, Spanish, and Portuguese. [Download and Install GDS Manager]
- Added more lever for User Management. [Basic Information]
- Added support to Open Door2 via remote PIN. [Configuration]
- Added ability to configure “Keep Door Open” from GDSManager and synchronize with GDS37xx. [Configuration]
- Added feature to record video when alarm event profile triggered. [Alarm Linkage]
- Added Account Number to the SIP number in call log. [Device Log]
- Added support to import user data via the CSV format file [Member]
- Added Private Door Password Configuration Field in Member Management. [Private Door Password]
- Increased the Log Operation Types [Device Log]
- Added sorting function based on time in administrator logs [Administrator Log]
- Added SIP mode to display the IP/Port for peering calls in the visiting logs and call logs. [Device Log]
- Added schedule batch modification option. [Schedule]
- Added SMTP support to GDSManager. [SMTP Server Information]
- Added option to select windows numbers to display when started.
- Added “Delete All” option in device configuration page. [Configuration]
- Regulated the maximum number of group to 50. [Group]
- Added keypad input error alarm under device log. [Device Log]
- Added manually configured email reporting function. [Report List]
- Updated UI Resource.
- Added GSDServer should display first when program initialized or launched.
- Added Record Server allowing configuration of the storage paths. [Starting GDS Server]
- Added “check box” in front of the search list of the device. [Search]
- Added prompted message of “Open Door Successfully” in the preview screen when door opened. [Realtime Video]
- Added Open Door feature. [Realtime Video]
- This is the initial version for the GDS Manager.